Open Windows File Explorer and drag some files to the ITR Renamer file list. You can also click the Add Files button and select them that way. To remove files, highlight them and press the delete button on your keyboard. You can add or remove file details with the checkboxes below the file list. Click on the column header to sort the files.
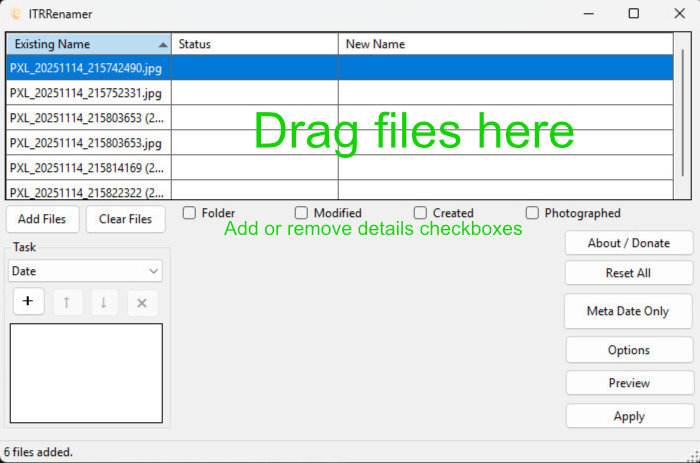
I have added some jpeg images. Some of these photos were taken with a phone that recorded the picture’s date in the file. (Clicking the Photographed check box displays the date). Right now the file names have no meaning, so we will rename them to something useful. Select the Rename option from the Task drop down list.
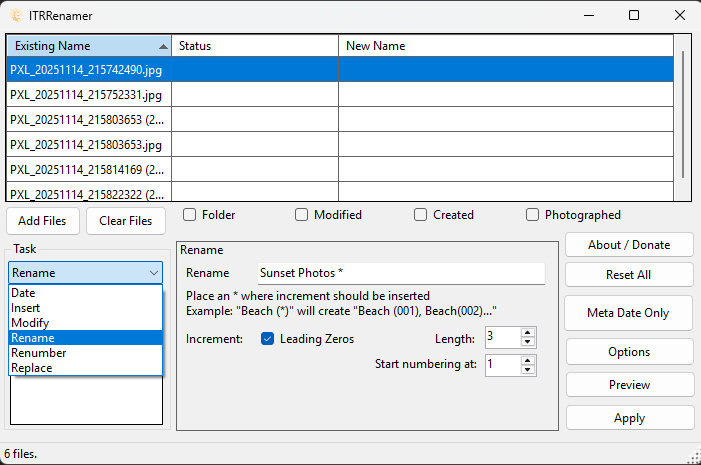
In the rename box I added a name that has meaning and an * which tells ITR Renamer where to place and increment counter. Without a counter, all the files would have the same name. Click the Preview button to see what file names will be created.

I like to put dates on my photos, so I will add another Task and select Date this time. Tasks are performed in sequence, and you can have any number of tasks. After clicking the Preview button I now have a lists of files with a legible name and the date they were taken.
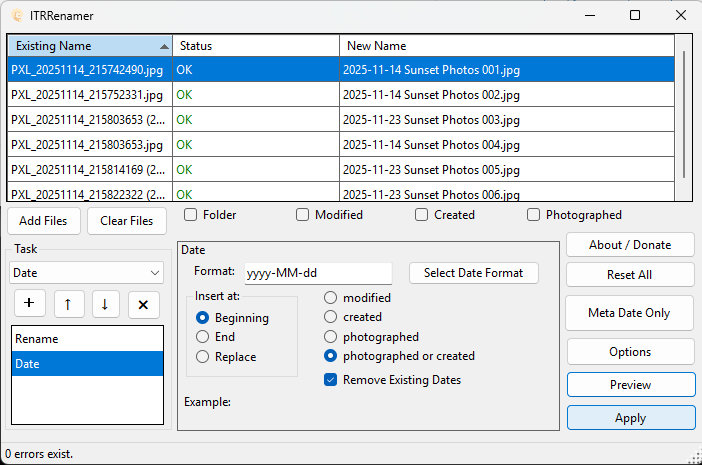
If renaming errors would result, the Status column will report what the error is. Now, you can click Apply to rename the files permanently.